7.2 | Appearance: Fill & Stroke
Key Terms
- Appearance Panel
- A panel (Window > Appearance) that lists every fill, stroke, and effect applied to a selected object as a stack, in the order they’re applied. Click any listed attribute to edit it, or drag it to a new position in the stack to change the result.
- Eyedropper Tool
- Samples the complete appearance of one object. Fill color, stroke color and weight, and any effects. And applies that whole look to another object with a single click.
- Recolor Artwork
- A dialog (Edit > Recolor Artwork) that displays every color currently used in a selection as an editable color group, letting you remap colors, reduce a design to fewer colors, or apply a harmony rule to an entire illustration at once instead of editing each fill individually.
An object in Illustrator isn’t just “a shape with a color”. It’s a whole stack of fills and strokes, and the Appearance panel is where you see and control that stack.
Yesterday you organized where objects sit. Today you’ll dig into how one single object can carry more visual complexity than it looks like it should. Multiple fills, multiple strokes, stacked and reordered, all without adding a single extra path.
[10 Mins] Bell Ringer / Hook
Look at this circle: it has a thick colored ring, a thin white ring inside that, and a solid fill in the middle. How many separate objects do you think that took to draw?
“Trick question. That’s one circle, carrying three attributes. Today’s tool for seeing and controlling that is the Appearance panel.”
[10 Mins] Direct Instruction
“I Do”: starting from a single plain circle, the teacher live-demos:
- Opening the Appearance panel (Window > Appearance) and pointing out its default single fill + single stroke.
- Clicking Add New Stroke twice to add two more strokes, each a different weight and color, building a “target” ring effect.
- Dragging one stroke above another in the panel to change which ring shows in front.
- Using Duplicate Item on the fill, then changing the duplicate’s blending mode to add a subtle inner tint.
- Sampling the finished look onto a second, unrelated circle with the Eyedropper tool. one click, whole appearance copied.
- Selecting both circles and opening Recolor Artwork to shift the whole palette to a different hue in one move.
Check for Understanding Recall: “What panel shows every fill and stroke on a selected object, in order?” Analysis: “Why did dragging a stroke to a new position in the panel change what the object looks like, even though I didn’t touch the artwork itself?” Synthesis: “If a client asked for the same logo mark in three color variations, which tool from today would get you there fastest, and why?”
[23 Mins] Guided Practice
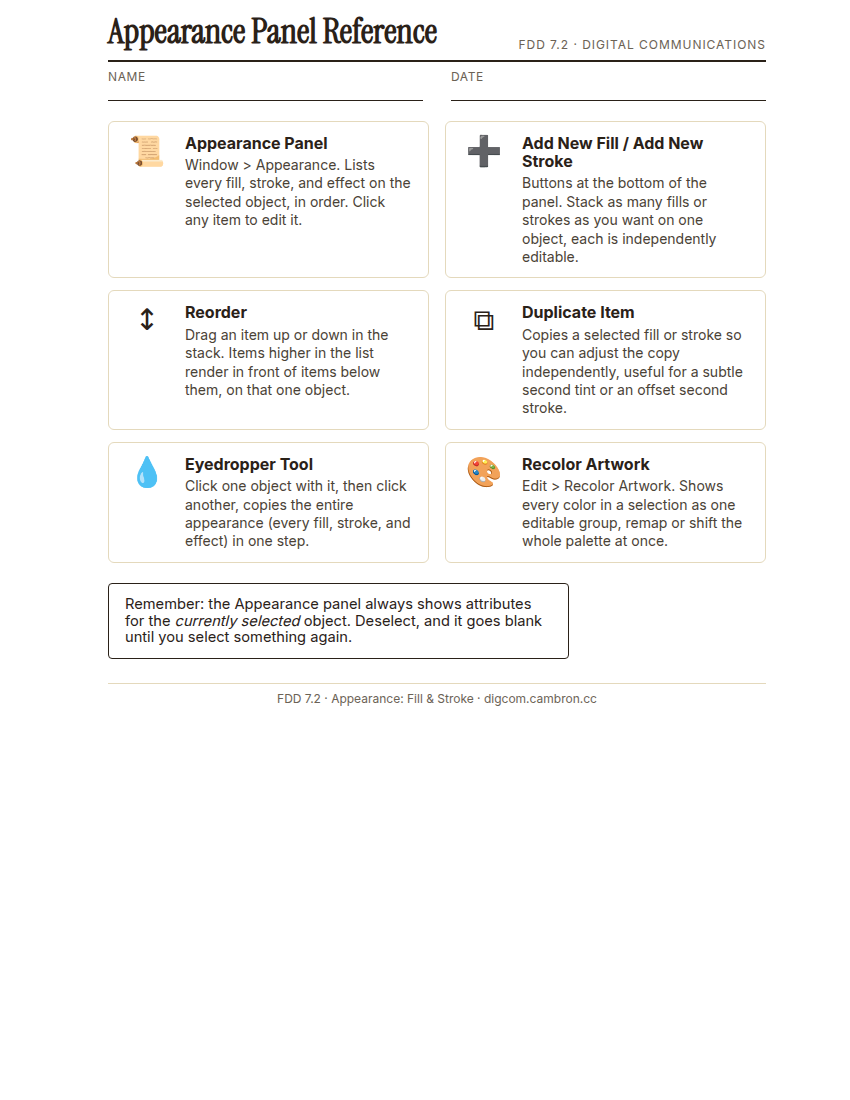
Complete the handout, three hole punch it, and keep it in your class binder.
⬇ Download Worksheet (PDF)- Draw a simple base shape (circle, hexagon, or square) for your own logo mark.
- Build up at least two strokes and one fill in the Appearance panel, reordering at least once to get the visual result you want.
- Duplicate one attribute and adjust it (a different weight, opacity, or blending mode) to add depth.
- Trade computers with a partner (10 min): use the Eyedropper to sample your partner’s finished appearance onto a shape of your own. Discuss: what looked different once it was on your shape instead of theirs?
- Select your own mark and use Recolor Artwork to generate one alternate color version.
[30 Mins] GMetrix / BrainBuffet Self-Guided Strand
Continue GMetrix Module 4. Dobson Poster. Notice how many separate fill/stroke attributes the poster’s title treatment uses. That’s the same Appearance-panel stacking you just practiced, just applied to type instead of a shape.
[5 Mins] Exit Ticket / Wrap-Up
Save your file as LastName_FirstName_7_2_Appearance.ai.
🗂 Organize: Put one sentence naming the order your fills/strokes are stacked in and why in your binder. Save your logo mark file (screenshot including the Appearance panel) in the Photos folder of your Digital Design project folder on Google Drive.
📤 Exit Ticket: Glow & Grow. On a scrap of paper, write about today’s work in at least 3 sentences (aim for 5): describe one Glow (something that went well) and one Grow (one thing you’d do differently or improve next time), explaining each with real detail, not just a phrase.
Stuck on how to start? Try: “My Glow today was ___, because ___. My Grow is ___. Next time I’ll try ___.”