3.2 | Make
Key Terms
- Tripod
- A three-legged stand used to provide stable support for the camera.
- Microphone (Mic)
- A device that converts sound waves into electrical signals.
- Lavalier (Lav)
- A small microphone clipped to clothing for close-range audio capture.
- Shotgun Mic
- A highly directional microphone used to capture sound from a distance while rejecting peripheral noise.
- Handheld Mic
- A standard microphone held by a reporter or interviewee.
- Headphones/Earpiece
- Used by the camera or audio operator to monitor sound quality while recording.
- Batteries/Power Supply
- Portable power sources essential for on-location shooting.
- Media/Storage
- Digital cards (like SD or CF cards) used to record and store footage.
- White Balance
- An adjustment on the camera to ensure colors (especially white) are rendered correctly regardless of the light source.
- Focus
- The sharpness or clarity of the image.
Today you shoot what your ENG Report Planner called for. And the difference between amateur and professional footage almost always comes down to a few consistent habits, not fancy equipment.
Direct Instruction (~10 min)
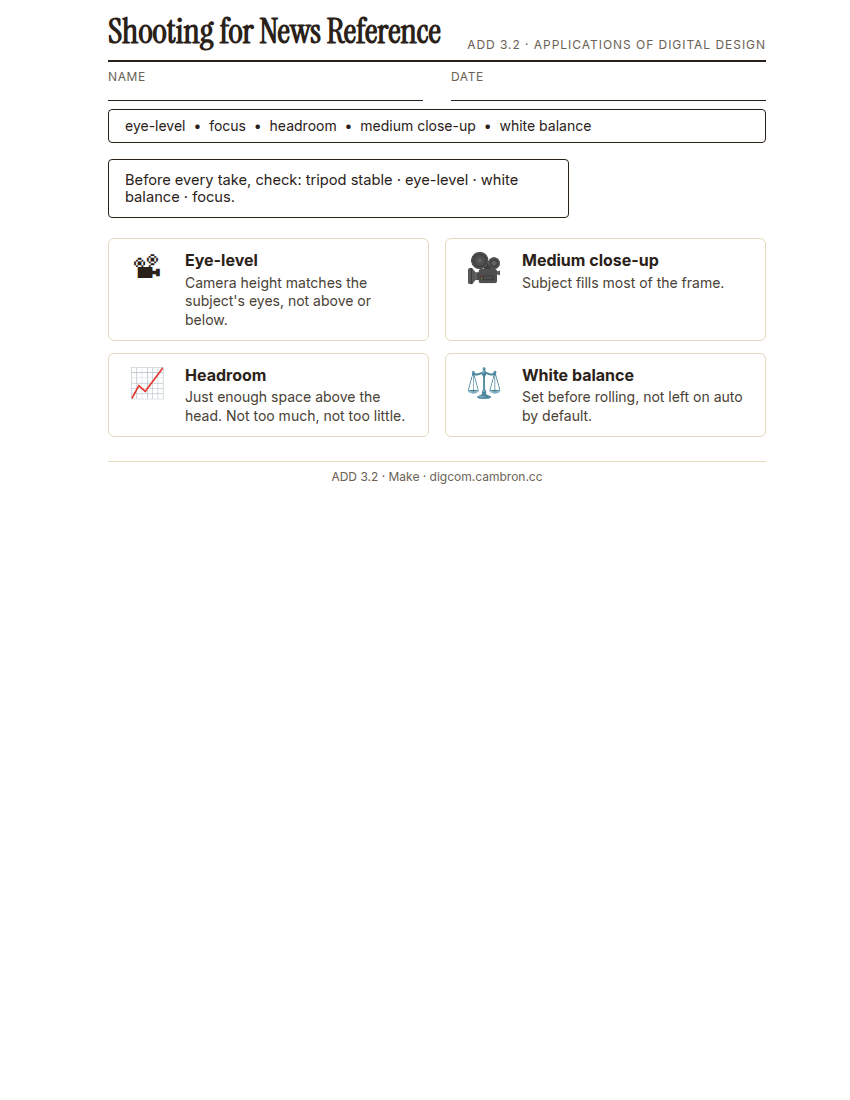
Complete the handout, three hole punch it, and keep it in your class binder.
⬇ Download Worksheet (PDF)“Camera at eye-level, subject filling most of the frame in a medium close-up, and just enough headroom. Not too much, not too little. These three habits alone separate a professional-looking shot from an amateur one.”
Walk through: tripod stability, camera eye-level with the subject, medium close-up framing, correct headroom, and checking white balance and focus before rolling.
Scaffolded questions. Cold-call through all three:
Recall: “What does ‘headroom’ mean, and what happens if there’s too much of it?”
Analysis: “Why does a shaky, handheld shot undercut a news story’s credibility, even if the content is accurate?”
Synthesis/Extension: “If you were only allowed 2 of these 4 checks before rolling. Tripod, eye-level, white balance, focus. Which 2 would you never skip, and why?”
Guided Practice | Shoot Practice Footage (~23 min)
- Set up your tripod at your subject’s eye-level.
- Frame a medium close-up with correct headroom. Subject filling most of the frame.
- Check white balance and focus before recording.
- Rotate roles within your group: camera operator, interview subject, director. Everyone gets a turn framing a shot.
Organize
- Ensure that Google Drive for Desktop is syncing to your computer.
- Create a Project Directory (Folder) in your Google Drive
Google Drive/My Drive/Digital Design/YYYY-MM Project Name - Try to keep all of your project files for the explainer video together, so your work is not interrupted due to technical difficulties.
- In your project directory, maintain subdirectories for every category of resource you will be using.
Storing all your files in the /Downloads folder in your computer is a BAD idea. If any of these files are lost/deleted you will have to reconnect them. Put them in your project folder directly. This will also be helpful in the event of any computer issues.
| YYYY-MM Project Name |
| 📁 Source Footage |
| 📁 Graphics |
| 📁 Sound Effects |
| 📁 Music |
| 📁 Script |
- It’s also good to include directories for related files
| 📁 Project Files |
| 📁 Exports |
-
While editing your project, it will benefit you to right click on your project folder and select: “Make Available Offline”. This will keep your files stored on the local computer while you are editing. When you are finished editing the project, you can deselect this to free up space on your harddrive.
- Share your project folder with your group members.
- Log into Adobe Express, create a new video project, and import your footage from Drive.
Cold call check: you review your footage and the subject’s eyes are right at the very top of the frame with almost no headroom. What would you fix before the real shoot?
GMetrix/BrainBuffet (~30 min)
Continue Module 2: today’s sections extend into camera fundamentals directly relevant to today’s shoot.
Exit Ticket / Wrap-Up (~5 min)
🗂 Organize: Put your Shooting Reference sheet in your binder. Save your practice interview clip in the Source Footage folder of your Digital Design project folder on Google Drive.
📤 Exit Ticket: Glow & Grow. On a scrap of paper, write about today’s work in at least 3 sentences (aim for 5): describe one Glow (something that went well) and one Grow (one thing you’d do differently or improve next time), explaining each with real detail, not just a phrase.
Stuck on how to start? Try: “My Glow today was ___, because ___. My Grow is ___. Next time I’ll try ___.”