6.3 | Paragraph Settings & Area Type
Key Terms
- Point Type
- A single line of text anchored to one point, that keeps growing horizontally as you type unless you add a manual line break. Good for headlines and short labels.
- Area Type
- Text flowed inside a closed shape (a rectangle, or any custom path), automatically wrapping to the next line when it reaches the shape’s edge. Good for paragraphs and body copy.
- Type on a Path
- Text that flows along the contour of an open or closed path instead of a straight line or a shape.
- Glyph
- A specific visual representation of a character. The same letter can have multiple glyph variants (alternates, ligatures, swashes) within a single font.
- Placeholder Text (“Greeked” Text / Lorem Ipsum)
- Dummy text used to preview a layout’s typography and spacing before final copy has been written.
- Threading Text
- Linking two or more type areas so text flows continuously from one into the next.
- Wrapping Text
- Forcing type to flow around the contour of another object (like an image), instead of running behind or through it.
- Overflow Text
- Text that doesn’t fit inside its type area. Flagged by a small red plus (+) icon at the area’s bottom-right corner.
You already know how to build area type from Unit 5. Today’s about the paragraph-level polish that turns “text that fits in a box” into “text that’s genuinely comfortable to read.”
Direct Instruction | Live Demo (~10 min)
“See these gaps stretched out between words? That’s justified alignment fighting a column that’s too narrow for it. Let’s fix it.”
The teacher live-demos on a sample area-type paragraph:
- Alignment: comparing left, center, right, and justified.
- Indents: left, right, and first-line.
- Space before/after: adding breathing room between paragraphs.
- Hyphenation: toggling it on and off to compare the effect on a narrow column.
Recall: What’s the risk of using justified alignment in a narrow column? Analysis: Why does adding space after a paragraph usually read better than adding an extra manual line break? Synthesis: If a client’s brochure column looked “too dense,” which 2 settings from today would you try first, and why?
Guided Practice | Revise a Paragraph (~23 min)
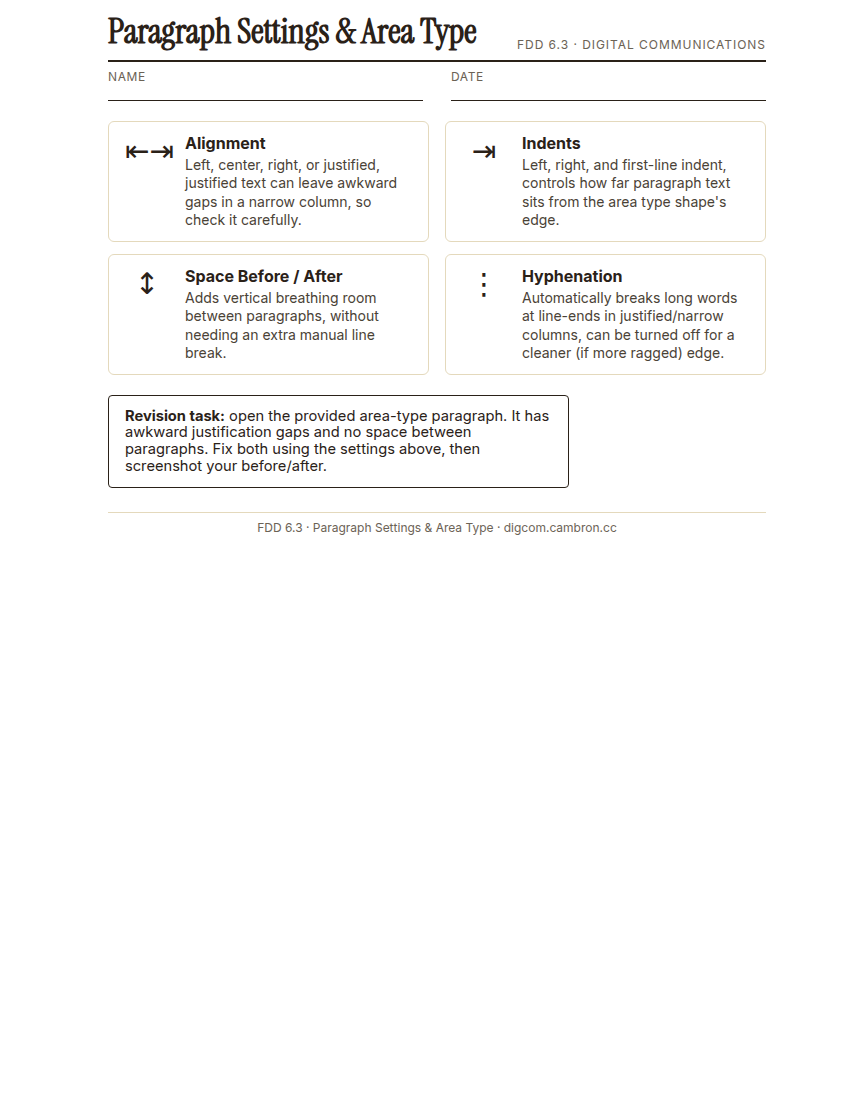
Complete the handout, three hole punch it, and keep it in your class binder.
⬇ Download Worksheet (PDF)- Diagnose (~5 min): open the provided file and identify what’s making the paragraph hard to read (awkward justification gaps, no space between paragraphs, etc.).
- Revise (~18 min): adjust alignment, indents, space before/after, and hyphenation to resolve the issues. Screenshot your before and after for comparison.
There’s no single “correct” paragraph setting for every situation. The goal is readability. Try more than one option and trust your eye.
Exit Ticket / Wrap-Up (~5 min)
Submit your before/after screenshot.
Which single paragraph setting made the biggest difference in today’s revision, and why?
🗂 Organize: Put your revised area-type paragraph in your binder. Save your before/after screenshot receipt in the Photos folder of your Digital Design project folder on Google Drive.
📤 Exit Ticket: Emoji Meter. On a scrap of paper, draw ONE face that matches how confident you feel about today’s skill: 🙁 (not yet), 😐 (getting there), or 🙂 (got it). Then explain why in at least 3 sentences (aim for 5), connecting your answer to something specific from today, not just a general feeling.
Stuck on how to start? Try: “I drew ___ because ___. Specifically, when I tried to ___, I ___. Next time I want to ___.”