2.3 | Editing Basics & Continuity Conventions
Key Terms
- Playhead
- The vertical line marking the current position in a sequence or clip, showing where playback starts and where edits are applied.
- JKL Navigation
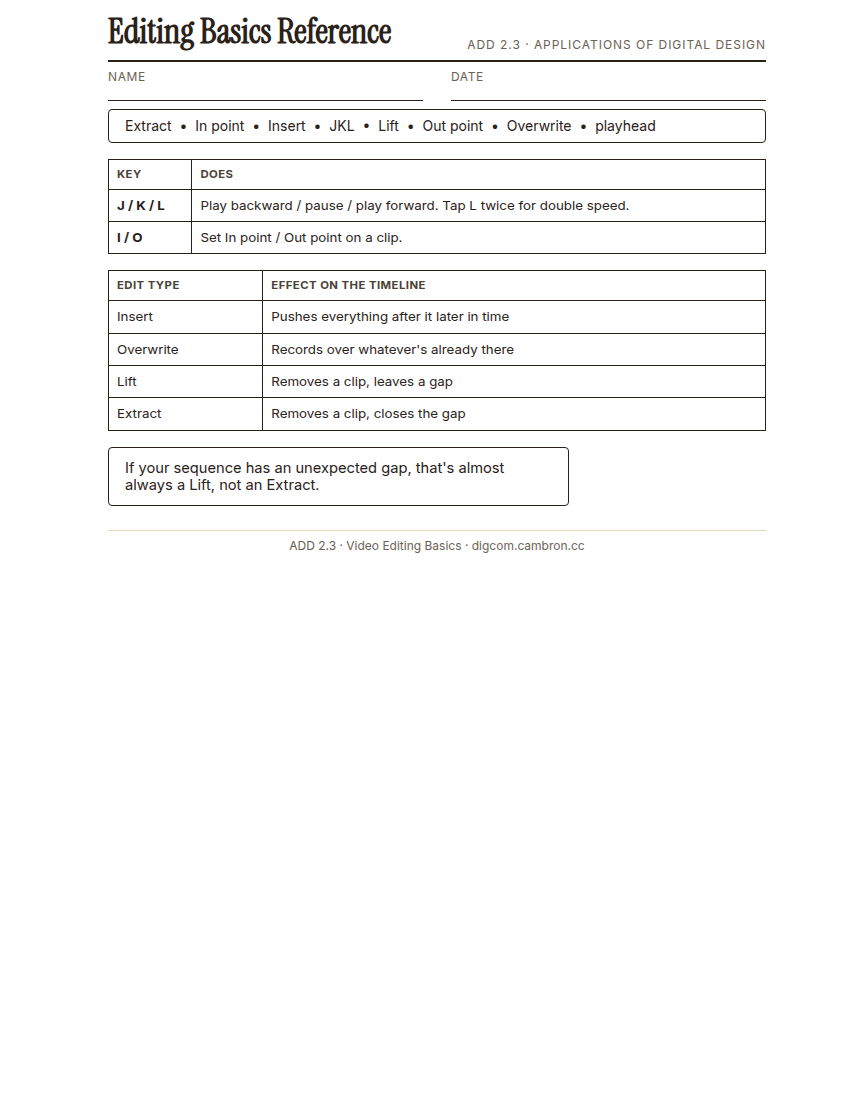
- The standard editing shuttle: J plays backward, K pauses, L plays forward. Pressing J or L multiple times increases playback speed in that direction.
- Markers
- Small flags placed on a clip or sequence at a specific point in time, used to note something worth returning to (a beat, a sound cue, a note to fix later).
- In and Out Points
- The In point marks where a clip should start playing; the Out point marks where it should stop. Together they define exactly what portion of a clip gets used.
- Insert
- Adding a clip into a sequence at the playhead, pushing everything after it later in time (like inserting a word into a sentence).
- Overwrite
- Adding a clip into a sequence at the playhead by recording over whatever’s already there, without shifting anything else in time.
- Lift
- Removing a clip from a sequence and leaving a gap behind. Everything else stays in place.
- Extract
- Removing a clip from a sequence and closing the gap. Everything after it shifts earlier to fill the space (also called a ripple delete).
- Bins
- Folders inside the Project panel used to organize footage, audio, and graphics. Named after the physical trim bins used to organize film reels during analog editing.
- Relinking
- Manually pointing Premiere back to a clip’s file after it’s been moved, renamed, or is missing. Without it, a moved clip shows as an offline/red placeholder.
- Labeling Clips
- Assigning a color label to clips in the Project panel or timeline to organize by type (for example, all B-roll one color, all interviews another) for faster visual scanning.
- L Cut
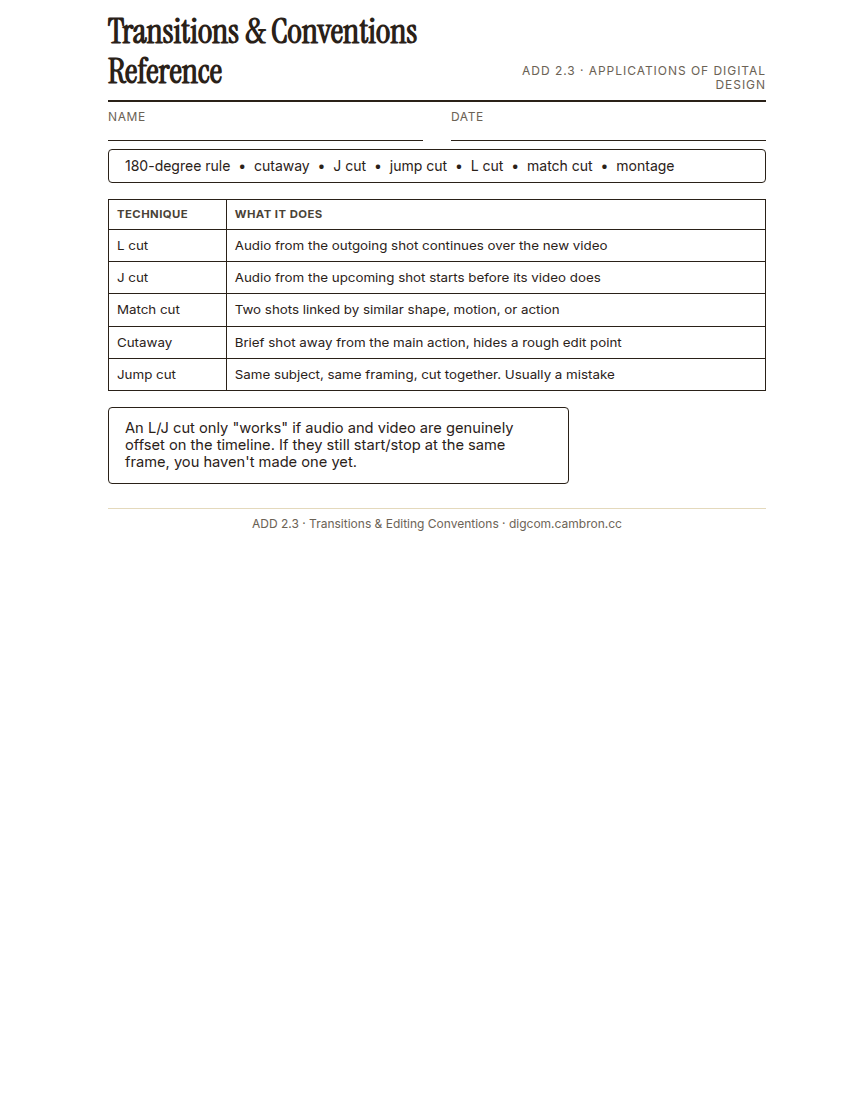
- A transition where a clip’s audio continues to play after its video has already cut to the next shot. Named for the shape it makes on the timeline.
- J Cut
- A transition where the next clip’s audio starts playing before its video appears. The mirror image of an L cut.
- Cross Cutting
- Alternating between two or more scenes happening in different locations, often to suggest they’re happening at the same time or to build tension between them.
- Match Cut
- A cut between two shots that share strong visual or compositional similarity, creating a smooth, often striking transition between very different subjects or times.
- Cutting on the Action
- Making a cut in the middle of a continuous physical action (a door opening, a hand reaching) so the motion itself hides the edit and keeps it feeling seamless.
- Cutaway
- A brief shot of something other than the main action, inserted to cover an edit, add context, or control pacing (for example, cutting to a listener’s reaction during an interview).
- Montage
- A sequence of short shots edited together to condense time, show a process, or build a feeling. Often set to music.
- Jump Cut
- A cut between two shots of the same subject that are similar enough to create a visible, jarring “jump”. Usually an editing mistake to avoid, unless used deliberately for effect.
Non-linear editing means every edit you make is really just an instruction. The original footage never changes, so you can rearrange, trim, and undo endlessly without losing quality. Today you’ll learn the core moves editors make hundreds of times an hour, then use them to build a sequence that actually feels smooth, not just assembled.
Direct Instruction (~15 min)
Complete the handout, three hole punch it, and keep it in your class binder.
⬇ Download Worksheet (PDF)“J, K, L. Backward, pause, forward. Tap L twice for double speed. This is how every professional editor moves through footage, because reaching for a mouse every time is too slow.”
Walk through: the timeline, the playhead, JKL navigation, setting In and Out points with I and O, and the four ways to get a clip onto the timeline. Insert (pushes everything later), Overwrite (records over what’s there), Lift (removes, leaves a gap), Extract (removes, closes the gap).
Complete the handout, three hole punch it, and keep it in your class binder.
⬇ Download Worksheet (PDF)“An L cut lets a voice keep talking while we’ve already cut to what they’re talking about. It’s one of the most common techniques in every interview-style video you’ve ever watched, and once you know to look for it, you’ll see it everywhere.”
Then: continuity editing (keeping the viewer oriented, not noticing the cuts), the 180-degree rule, L cuts and J cuts, match cuts, cutting on the action, cutaways, montage, and the jump cut (usually a mistake, not a choice).
Scaffolded questions. Cold-call through all three:
Recall: “What do the In and Out points on a clip actually control? And separately, what’s the difference between an L cut and a J cut?”
Analysis: “Why would an editor choose Overwrite instead of Insert when they know exactly where a new clip should go? Why does a cutaway help an editor hide an awkward edit point?”
Synthesis/Extension: “Find a jump cut in something you’ve watched recently. Was it a mistake, or a deliberate style choice? How can you tell?”
Guided Practice | Assemble, Then Refine (~26 min)
Assemble:
- Open your Unit 2 project from 2.2 and confirm your bins are still organized.
- Set In and Out points on at least 4 clips from your bins.
- Insert your first 2 clips onto the timeline in order.
- Overwrite your next clip directly into the middle of the sequence at a specific point.
- Practice a Lift and an Extract on a clip you no longer want, and compare what each leaves behind.
Refine, on the same sequence:
- Add an L or J cut somewhere audio and video don’t need to change at exactly the same frame. Let one lead or trail the other.
- Insert a cutaway to cover a rough edit point or add context.
- Check for accidental jump cuts: if two adjacent shots of the same subject look nearly identical, fix or intentionally justify it.
- Turn and Talk: trade seats with a partner and shuttle through each other’s sequence using only JKL. Can you tell where each edit type and each continuity technique was used?
An L/J cut only “works” if the audio and video are genuinely offset from each other on the timeline. If they still start and stop at the same frame, you haven’t actually made one yet.
Cold call check: you’re editing a two-person interview and the same speaker’s face is on screen for both their question and their answer. What continuity technique would make that feel less static?
GMetrix/BrainBuffet (~22 min)
Continue Module 1: today’s sections extend the same editing fundamentals into trimming and audio-sync territory.
Exit Ticket / Wrap-Up (~5 min)
🗂 Organize: Put your Editing Basics and Transitions & Conventions reference sheets in your binder. Save your revised sequence screenshot in the Screenshots folder of your Digital Design project folder on Google Drive.
📤 Exit Ticket: Emoji Meter. On a scrap of paper, draw ONE face that matches how confident you feel about today’s skill: 🙁 (not yet), 😐 (getting there), or 🙂 (got it). Then explain why in at least 3 sentences (aim for 5), connecting your answer to something specific from today, not just a general feeling.
Stuck on how to start? Try: “I drew ___ because ___. Specifically, when I tried to ___, I ___. Next time I want to ___.”