4.4 | Color Correction & Grading
Key Terms
- White Balance
- A camera or editing adjustment ensuring colors (especially white) render accurately under the current light source.
- Color Correction
- Adjusting recorded footage to shift colors back to an accurate, neutral baseline. Fixing a problem, not creating a look.
- Color Grading
- Adjusting already-corrected footage to create an intentional look that enhances mood and tone. A creative choice, not a fix.
- Lumetri
- Premiere Pro’s built-in color tool, with Basic Correction (white balance, exposure), Creative (style presets), and Curves/Color Wheels panels for grading.
- LUT (Look-Up Table)
- A preset that remaps a shot’s colors to a specific look. A fast starting point for grading, usually refined further by hand.
Color work happens in two distinct steps, in a specific order: fix the problem first, then make the creative choice. Skip straight to grading and you’re building a look on a broken foundation.
Direct Instruction (~10 min)
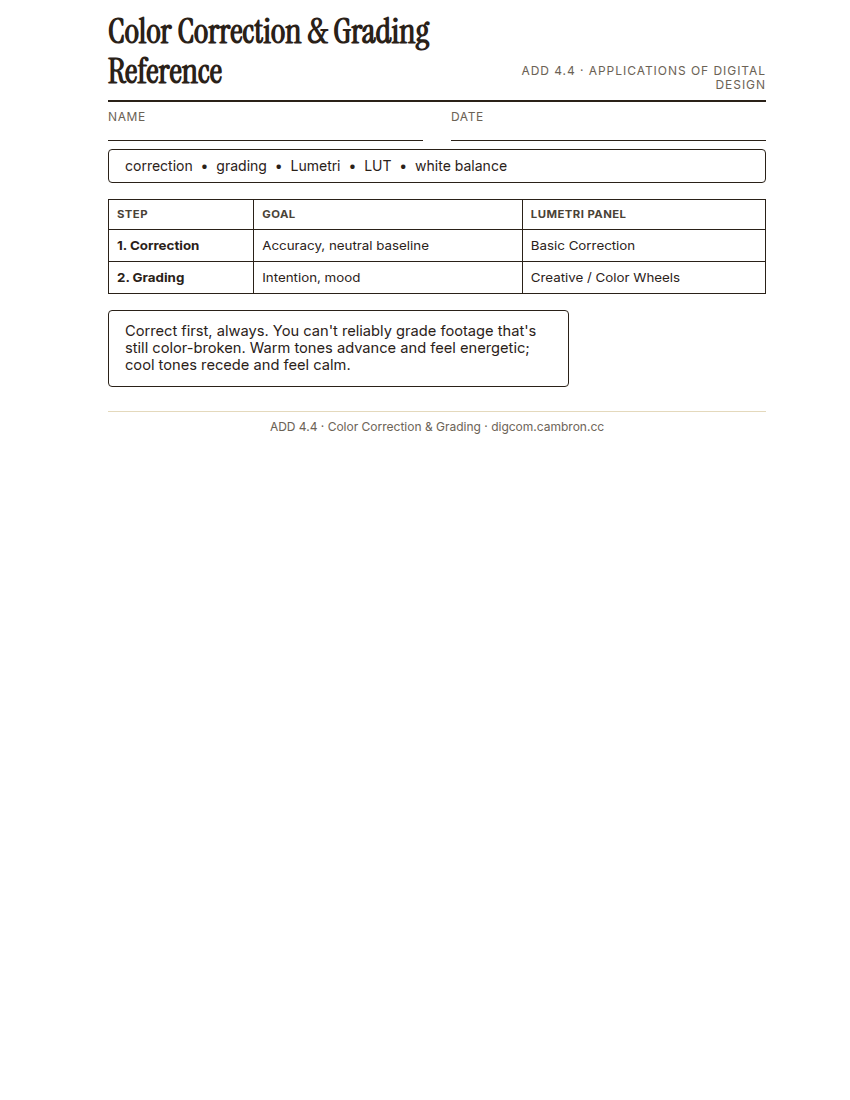
Complete the handout, three hole punch it, and keep it in your class binder.
⬇ Download Worksheet (PDF)“Correction is about accuracy, getting back to neutral. Grading is about intention, deciding what mood you actually want. Always correct first. You can’t reliably grade footage that’s still color-broken.”
Walk through: white balance, color correction (Lumetri’s Basic Correction panel), color grading (Lumetri’s Creative panel and Color Wheels), and LUTs as fast starting points for a grade.
One quick color-theory reminder before you grade: warm tones (orange, amber) read as advancing and energetic, while cool tones (teal, blue) read as receding and calm. That’s why so many film looks push shadows cool and highlights warm (the “teal and orange” look). Keep that in mind when you’re deciding what mood a grade should create.
Scaffolded questions. Cold-call through all three:
Recall: “What’s the difference between color correction and color grading?”
Analysis: “Why does correction always need to happen before grading, not after?”
Synthesis/Extension: “If a LUT gets you 80% of the way to the look you want, what should you do with the other 20%?”
Guided Practice | Correct & Grade (~23 min)
- Open the provided practice footage in Premiere and apply the Lumetri Color effect.
- Correct first: use Basic Correction to neutralize any off-color cast. Aim for accurate white balance and exposure.
- Grade second: apply an intentional look using the Creative panel or Color Wheels, choosing a specific mood.
- Partner critique: compare graded looks with a partner and explain what mood each choice creates.
- Export a before/after/graded comparison.
Cold call check: a classmate skips straight to grading without correcting first. What problem are they likely to run into?
GMetrix/BrainBuffet (~30 min)
Finish Module 3, including its module-completion checkpoint, due this unit.
Exit Ticket / Wrap-Up (~5 min)
🗂 Organize: Save your before/after/graded export in the Exports folder of your Digital Design project folder on Google Drive.
📤 Exit Ticket: 3-2-1. On a scrap of paper, write in complete sentences, not a list of fragments: 3 sentences describing things you did or made today, 2 sentences naming techniques or tools you used and how, and 1 sentence asking a question you still have.
Stuck on how to start? Try: “Today I ___. I also ___. I used ___ to ___. I also used ___ to ___. I’m still wondering ___.”