11.1 | Elements of Motion
Key Terms
- Composition (Comp)
- The container or workspace where every layer, effect, and animation in an After Effects project comes together, the equivalent of a Premiere sequence.
- Layer
- A single element (text, image, shape, video) inside a composition that can be animated and manipulated independently of every other layer.
- Anchor Point
- The fixed point a layer rotates and scales around. Move it off-center and rotation swings around that new point instead of the layer’s middle.
- Precomposing
- Grouping several layers into a single new composition nested inside the original, so they can be animated, scaled, or effected together as one unit.
- Render Queue
- After Effects’ export system. Add a composition to the queue, choose render/output settings, then render, similar to Premiere’s Media Encoder but built into the same application.
- Keyframe
- A marker that sets a property’s value (position, opacity, scale) at a specific point in time. Premiere animates smoothly between two or more keyframes.
- Temporal Interpolation
- How a value changes over TIME between keyframes. Linear (constant speed) vs. eased (gradual speed changes).
- Spatial Interpolation
- How a value changes through SPACE between keyframes. A straight-line path vs. a smooth curved path.
- Ease In / Ease Out
- A keyframe interpolation style that gradually speeds up or slows down motion, instead of starting and stopping abruptly.
- Opacity
- How transparent or solid a layer is, animatable with keyframes to create fades or reveals.
Premiere edits existing footage. After Effects builds motion from nothing, a shape, a keyframe, and a decision about how that shape moves between two points.
Direct Instruction (~10 min)
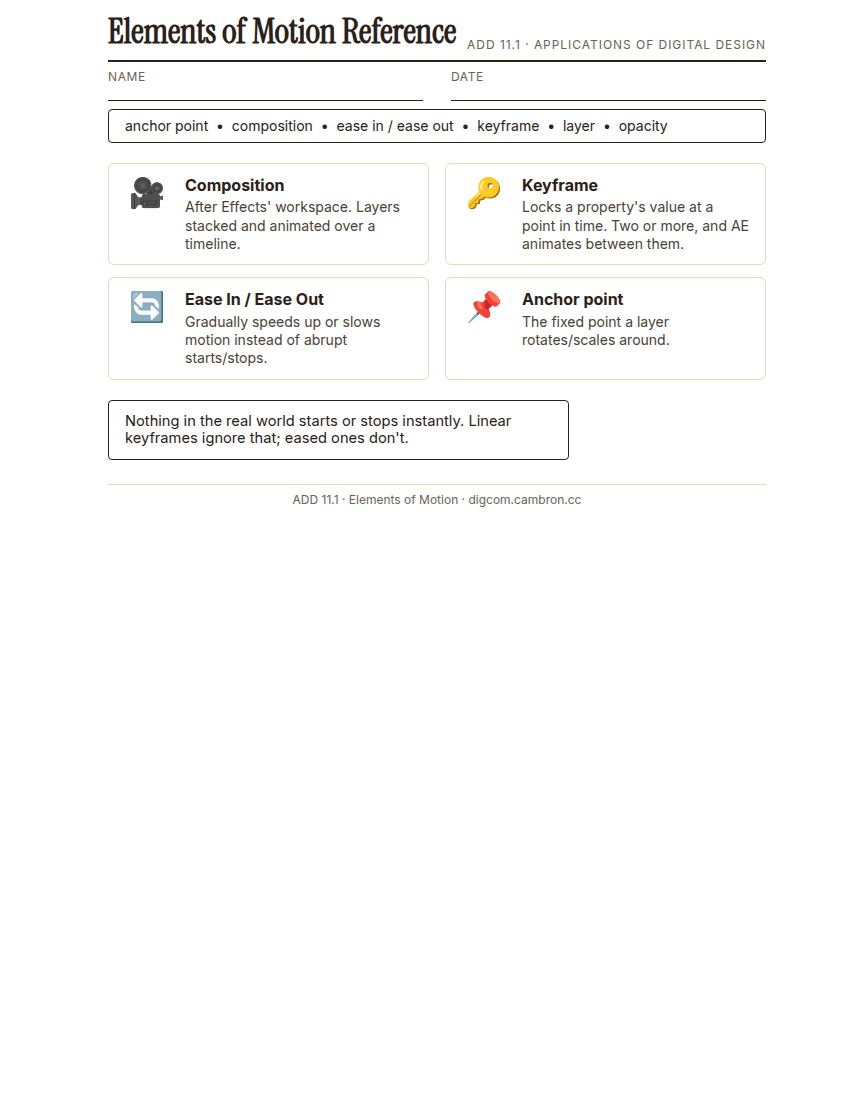
Complete the handout, three hole punch it, and keep it in your class binder.
⬇ Download Worksheet (PDF)A composition is After Effects’ workspace, layers stacked inside it, animated over a timeline. Set a keyframe to lock a property’s value (position, opacity, scale) at a specific point in time. two or more keyframes and AE animates smoothly between them. Left at the default, that motion is linear, constant speed, abrupt starts and stops. Ease in and ease out gradually speed up or slow down the motion instead, the difference between something that looks animated and something that looks alive.
“Nothing in the real world starts or stops instantly. A ball doesn’t hit top speed the moment you throw it. Linear keyframes ignore that; eased ones don’t.”
Scaffolded questions. Cold-call through all three:
Recall: “What does a keyframe actually lock in place?”
Analysis: “Why does linear motion read as robotic compared to eased motion?”
Synthesis/Extension: “You want a shape to feel like it’s falling under gravity, speeding up as it drops. Which easing would you use, and why?”
Guided Practice (~23 min)
- Create a new composition and add a shape layer.
- Set position keyframes moving the shape across the frame.
- Apply Ease In/Ease Out to those keyframes and compare the motion to the un-eased version.
- Add opacity and scale keyframes so the shape fades and grows as it moves.
- Turn and Talk: compare your eased animation with a partner’s before finalizing.
What changed visually between your linear version and your eased version of the same animation?
Studio/Project Work Time (~30 min)
Extend your animation: add a second layer that reacts to or complements the first (for example, a second shape that enters just as the first one settles). Keyframe its position, opacity, and scale with eased interpolation, matching today’s technique.
Exit Ticket / Wrap-Up (~5 min)
Save your file, then screenshot the Timeline panel showing your keyframes.
🗂 Organize: Put your guided notes in your binder. Save your Timeline panel screenshot showing eased keyframes in the Photos folder of your Digital Design project folder on Google Drive.
📤 Exit Ticket: Stoplight. In the discussion board below, let us know how you’re doing: G (green: I’ve got this, ready to move on), Y (yellow: I mostly get it, still have a question), or R (red: I’m stuck, I need help). Then explain your rating in at least 3 sentences (aim for 5): what specifically about today’s skill makes you feel that way, and, if you’re yellow or red, what your actual question is.
Stuck on how to start? Try: “I picked ___ because ___. Specifically, when I tried to ___, I ___. One thing that would help is ___.”