S | 5 | Typographic Poster
Over the next several class meetings, you’ll design and produce an original typographic poster. A single finished piece where the type itself, not a photo or illustration, carries the entire design.
Project Idea
| Driving Question | How can typography alone, without photography or illustration, communicate a message, mood, and visual identity? |
|---|---|
| Learning Goals | Select and justify a typeface pairing using anatomy/classification vocabulary; refine Character panel settings for legibility and impact; use at least one special-type element (area type or type on a path); keep text flow clean with no overflow; convert final type to outlines. |
| Project Summary | Students design an original poster built entirely from typography, choosing a quote, topic, or message and expressing it through typeface choice, scale, color, and layout alone. |
| Major Products | A finished poster file and exported portfolio image. Optionally, a printed poster for physical display. |
| Making it Public | Published to each student’s portfolio website. Printed posters displayed in a class gallery walk. |
| Key Project Documents | General Rubric for Individual Projects (see Resources > Rubrics) |
Project Path
Intro (~10 min, Day 1)
- Review the poster brief and the required-skills checklist: justified typeface pairing, refined Character panel settings, one special-type element, clean text flow, and outlined final type.
Trend Research: Poster Gallery Walk (~15 min, Day 1)
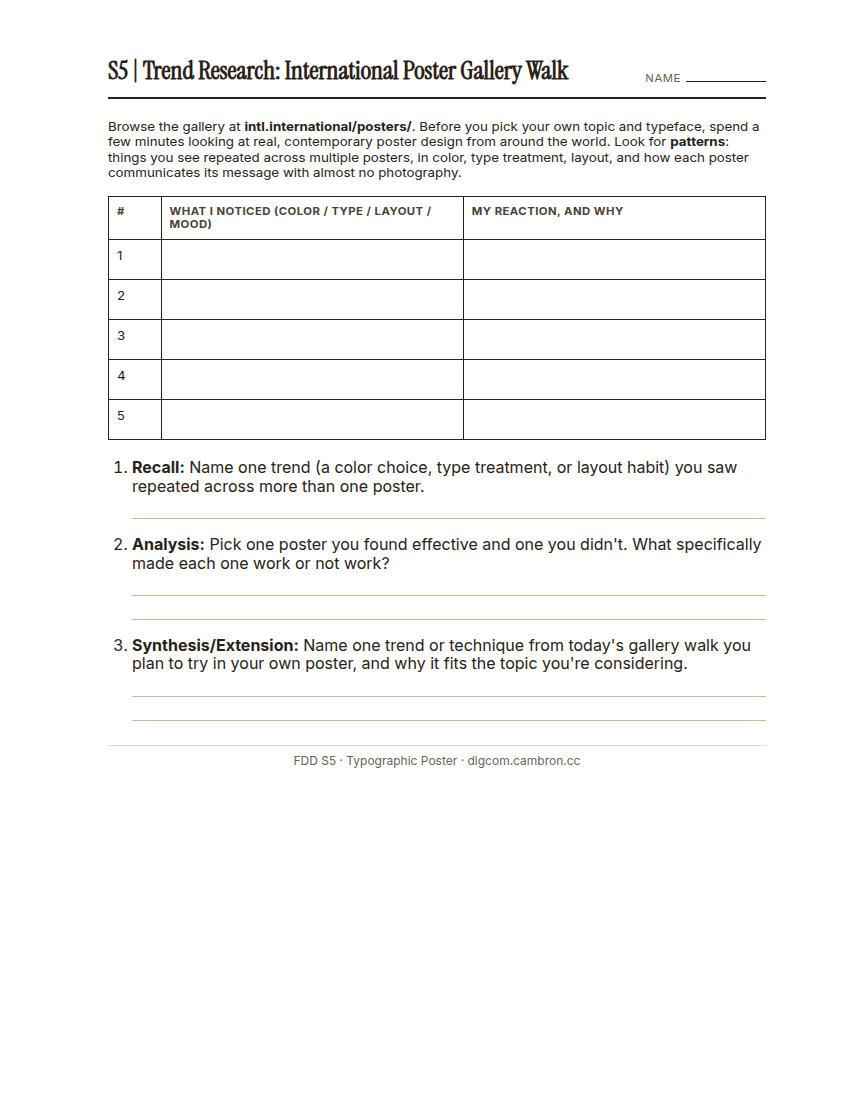
Complete the handout, three hole punch it, and keep it in your class binder.
⬇ Download Worksheet (PDF)Before picking a topic or typeface, browse real, contemporary poster design at intl.international/posters/ and complete the trend-research worksheet. Record at least 5 posters, then answer the three reflection questions. Look for patterns across multiple posters: color choices, type treatment, layout habits, and how each poster communicates its message with little or no photography.
Cold-call a few students to share one trend they noticed and one poster they reacted strongly to (positive or negative), before moving into topic/typeface selection.
Concept & Typeface Selection (~35 min, Day 1)
- Choose a poster topic. A quote, a single word, an event, or a message you want to communicate.
- Select a typeface pairing (usually one display/headline typeface plus one more restrained body/support typeface). Run 5.1’s concord/conflict check: your two faces should come from different classifications. If they’re both serif or both sans-serif, that’s conflict, not contrast. Be ready to justify the pairing using 5.1’s classification vocabulary.
- Plan your type hierarchy using 5.2’s contrast dimensions. Stack at least two (size, weight, structure, form, direction, or color) between your most important and least important text, not just a small size bump.
- Begin a rough composition sketch or digital layout.
Organize (File Management)
- Ensure that Google Drive for Desktop is syncing to your computer.
- Create a Project Directory (Folder) in your Google Drive
Google Drive/My Drive/Digital Design/YYYY-MM PROJECT NAME - Try to keep all of your project files for this project together, so your work is not interrupted due to technical issues.
Storing all your files in the /Downloads folder in your computer is a BAD idea. If any of these files are lost/deleted you will have to reconnect them. Put them in your project folder directly. This will also be helpful in the event of any computer issues.
- In your project directory, maintain subdirectories for every category of resource you will be using.
| YYYY-MM Project Name |
| 📁 Graphics |
| 📁 Sketches |
| 📁 Photos |
| 📁 Notes |
- It’s also good to include directories for related files
| 📁 Project Files |
| 📁 Exports |
Develop (remaining project days)
- Build out your poster in Illustrator: refine kerning, tracking, and leading (5.2); incorporate at least one special-type element such as Type on a Path or a shaped area type block (5.3); keep any longer text threaded cleanly with no overflow (5.4).
Structured Peer Review. Once your poster has a legible draft composition, do a full Plus/Delta peer review pass with a partner, focused specifically on legibility and typeface justification:
1. Prepare
- The Draft: Ensure your work is exported or ready to view. It doesn’t have to be perfect. Placeholders for missing pieces are okay!
- The Plus/Delta Chart: Create a simple T-chart on a piece of paper or a digital document:
- Plus (+): What is working well? (Strengths, clear storytelling, strong technique).
- Delta (Δ): What should be changed or improved? (The Greek symbol for “change”).
2. The Review Process
- Silent First Pass: Experience the work all the way through once without speaking. This allows the reviewer to experience the “flow” of the piece.
- Second Pass: Go through it again, but this time, the reviewer should jot down specific notes in the Plus and Delta columns.
- The Golden Rule: Feedback should be Specific, Objective, and Kind.
- Bad: “I didn’t like the ending.”
- Good: “The ending felt abrupt because the music cut off before the reporter finished speaking.”
3. Giving Feedback (The Reviewer)
- Identify the “Pluses”: Start with what is successful.
- Suggest the “Deltas”: Instead of just pointing out a mistake, offer a solution.
- Example: “The transition at 0:45 is a bit slow; maybe try a simple cut instead of a dissolve.”
4. Receiving Feedback (The Creator)
- Listen Without Defending: It’s tempting to explain why you made a choice, but for now, just listen and take notes. If a peer is confused, a general audience likely will be too.
- Ask Clarifying Questions: If a note is vague, ask for the exact timestamp or location: “Can you show me exactly where the audio got too loud?”
5. The Revision Plan
After the session, look at your Delta column and prioritize your edits:
- Level 1 (Critical): Technical errors (missing audio, black frames, typos).
- Level 2 (Message): Pacing issues or confusing sequences.
- Level 3 (Polishing): Color tweaks, fancy transitions, or extra effects.
Implement (final project day)
- Finalize your composition and proofread all wording carefully. once your wording is completely final, convert your finished type to outlines (5.4).
- Write your typeface-justification statement: a short explanation of why you chose your typeface pairing and how your Character panel choices support your poster’s message.
- Export your finished poster as a PNG for your portfolio:
When you're finished, export your design as a PNG image for your portfolio.
1Open the File menu. Choose Export, then Export As…
2Choose PNG as the file format. Check the box for Use Artboards.
This crops your export to the size of your artboard (the page). Always check this box.
3Set your export options, then click OK.
Publish your work to your Google Sites Portfolio
- Create a new page on your Google Sites Portfolio to catalog your work.
- Your work should be exported in a web-safe format in a manner that allows for the work to be embedded without requiring Google Drive permissions
- Your work should be accompanied by a detailed project description
- Submit the published portfolio page to your LMS (Schoology)
Reflect (final project day)
How did your typeface choice and Character panel settings work together to support your poster’s message? What would you change if you had one more class period?
🗂 Organize: Put your typeface-justification statement in your binder. Save your finished poster file in the Project Files folder of your Digital Design project folder on Google Drive. Save an exported image of your poster for your portfolio in the Exports folder of your Digital Design project folder on Google Drive.